| SWAT Turret | |
|---|---|
| Description | |
| Enemy Type | Automatic Sentry Gun |
| Statistics | |
| Health | 35,000 (Normal) 35,000 (Hard) 125,000 (Very Hard) 250,000 (Overkill) 400,000 (Mayhem/Death Wish/Death Sentence) |
| Shield Health | 700 (Normal) 700 (Hard) 3,000 (Very Hard) 5,000 (Overkill) 7,000 (Mayhem/Death Wish) 7,000 (Death Sentence) |
| Headshot Multiplier | 100 (Normal) 100 (Hard) 100 (Very Hard) 100 (Overkill) 100 (Mayhem) 100 (Death Wish/Death Sentence) |
| Extra Statistics | |
| Turret Magazine | 400 (Normal+) 800 (Mayhem+) |
| Turret Rate-of-Fire | 1,000 |
| Turret Reload | 8s |
| Turret Damage | 2 (Normal) 5 (Hard) 13 (Very Hard) 20 (Overkill) 35 (Mayhem+) |
| Repairs shield? | Twice |
| Other | |
| Internal name | |
| Achievement(s) | |
| v·d·e | |
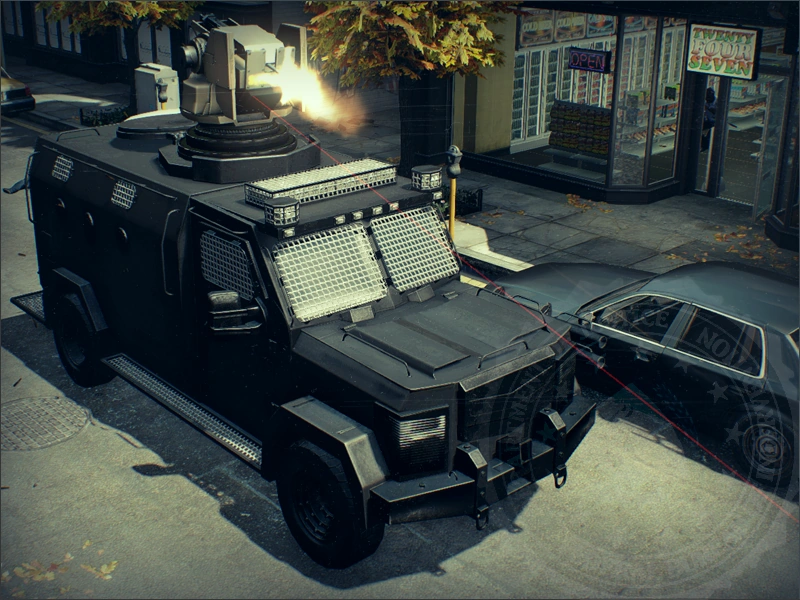
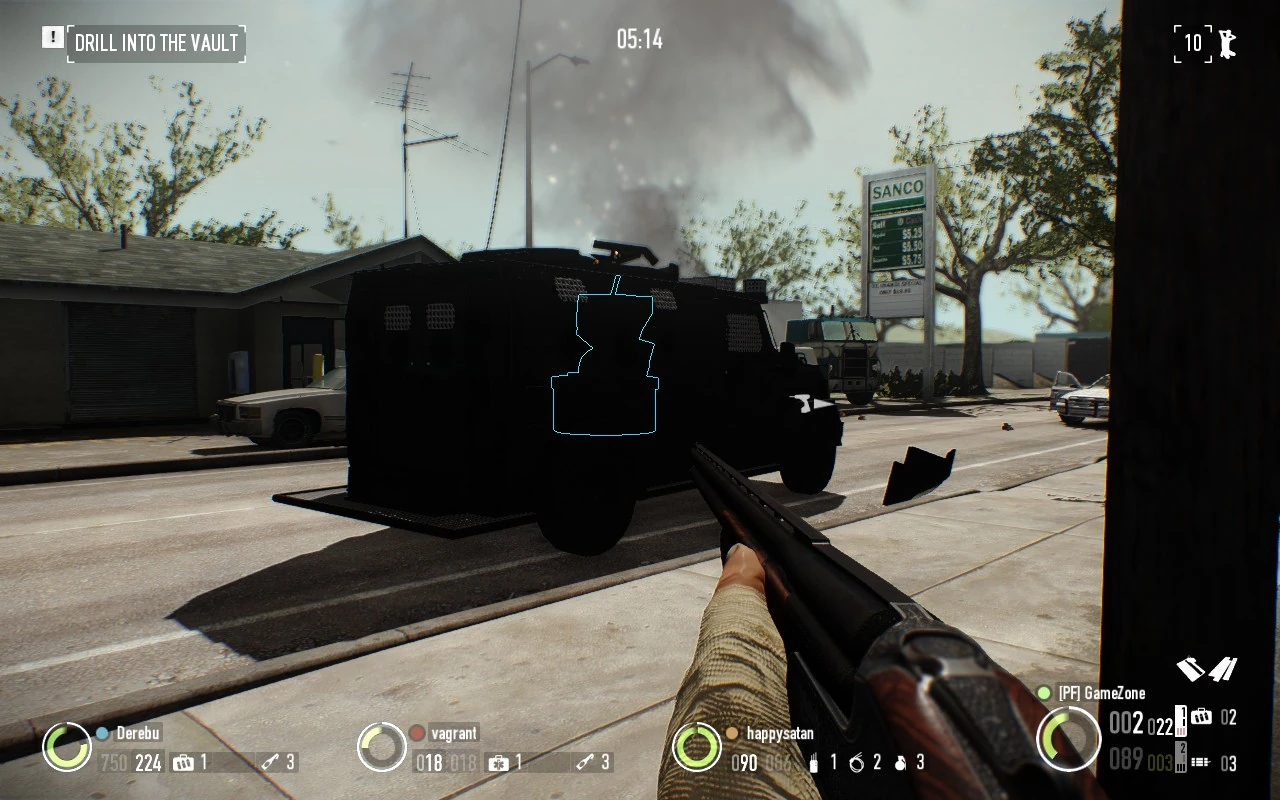
The SWAT Turret is a special enemy in PAYDAY 2, unlocked on February 10th 2015 as part of The Hype Train community event, at 300,000 gallons of hype fuel. It was released during the Spring Break Event (13-21 March) on day 5.
While commonly mounted on SWAT Van's in open outdoor areas, they can also appear under helicopters, and indoor turrets exist mounted on the roof.
Overview
- "An expensive but effective piece of kit. This converted armored truck sports a remote-controlled turret. It can lay down a huge amount of suppressive fire in its field of view. The turret itself is also heavily reinforced, with the main part of the gun being protected by plates of ballistic armor.
My Notes: The introduction of these mobile turrets was inspired. They’re damn near indestructible. Not the most accurate, but capable of laying down some withering suppressive fire. Still need to drill our teams more in their tactical use - I want to see SWAT teams pushing the Payday gang into the FOV of these turrets." - —FBI Files Description.
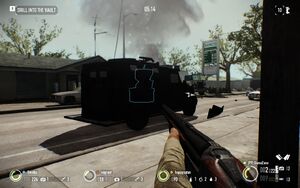
The SWAT Turret is usually composed of a black armored SWAT van with an automated turret on top of it that features a laser targeting module. The Turret is stationary and acts as the law enforcer's version of the sentry gun. The turret itself has a medium attack range, but when made friendly with the use of an ECM jammer, it gains a significant range boost, capable of gunning down even Snipers if it happens to scan over them.
Despite being mechanical, the SWAT Van Turret does have an applied "headshot" damage multiplier. Once the armor plates surrounding the targeting lens are destroyed, the fragile lens becomes exposed, which serves as the unit's "head", and any shot landed there will receive a 100x damage boost. Due to this, this special unit bears many similarities to a Skulldozer, albeit a stationary one.
As of Update #86, the Turret gained a minor self-repair ability that causes the gun platform to retract into the vehicle briefly before emerging at full health. A single turret can only self-repair up to three times and any destroyed armor plates will regenerate. They will also deploy tear gas to ward off players who attempt to get up close. Also, a loudspeaker like voice will announce when a Turret is about to enter the field and deploy.
Interestingly enough, this turret design seems to have caught on somewhere else and is not unique to the FBI. As observable during the incursions of several specific locations, it appears that rich and powerful individuals and PMCs such as Murkywater and Ernesto Sosa can acquire their own turrets for their own defense. These turrets are often mounted to the ceiling or other high-hanging structures so as to allow them to drop down and engage targets without obstructing the path of ground units.
Appearances
| Ceiling Turret | |
|---|---|
| File:Cealing turret.png | |
| Description | |
| Enemy Type | Automatic Sentry Gun |
| Statistics | |
| Health | 8,750 (Normal) 8,750 (Hard) 62,500 (Very Hard) 125,000 (Overkill) 200,000 (Mayhem/Death Wish/Death Sentence) |
| Shield Health | 20 (Normal) 700 (Hard) 1,500 (Very Hard) 2,500 (Overkill) 3,500 (Mayhem/Death Wish) 3,500 (Death Sentence) |
| Headshot Multiplier | 100 (Normal) 100 (Hard) 100 (Very Hard) 100 (Overkill) 100 (Mayhem) 100 (Death Wish/Death Sentence) |
| Extra Statistics | |
| Turret Magazine | 400 (Normal+) 800 (Mayhem+) |
| Turret Rate-of-Fire | 1,000 |
| Turret Reload | 8s |
| Turret Damage | 2 (Normal) 5 (Hard) 13 (Very Hard) 20 (Overkill) 35 (Mayhem+) |
| Repairs shield? | No |
| Other | |
| Internal name | |
| v·d·e | |
| Ceiling Turret (Broken Scarface Mansion version) | |
|---|---|
| File:Cealing turret.png | |
| Description | |
| Enemy Type | Automatic Sentry Gun |
| Statistics | |
| Health | 12,500 (Normal) 12,500 (Hard) 12,500 (Very Hard) 12,500 (Overkill) 12,500 (Mayhem/Death Wish/Death Sentence) |
| Shield Health | 20 (Normal) 20 (Hard) 20 (Very Hard) 20 (Overkill) 20 (Mayhem/Death Wish) 20 (Death Sentence) |
| Headshot Multiplier | 100 (Normal) 100 (Hard) 100 (Very Hard) 100 (Overkill) 100 (Mayhem) 100 (Death Wish/Death Sentence) |
| Extra Statistics | |
| Turret Magazine | 400 |
| Turret Rate-of-Fire | 1,000 |
| Turret Reload | 8s |
| Turret Damage | 30 (Normal) 30 (Hard) 30 (Very Hard) 30 (Overkill) 30 (Mayhem+) |
| Repairs shield? | No |
| Other | |
| Internal name | |
| v·d·e | |
- Bank Heist (all variants)
- Beneath the Mountain (ceiling turret overhead in the mountain base)
- Brooklyn 10-10
- The Biker Heist (normally in Day 1, normally or on bottom of helicopter on Day 2)
- Birth of Sky
- Boiling Point (ceiling turret overhead in the lab's center room and/or in the scanning room)
- Counterfeit
- Diamond Store
- Election Day (Day 2 Plan A/B)
- Firestarter (Day 3)
- First World Bank
- Four Stores
- Framing Frame (Day 2)
- Green Bridge (bottom of helicopter)
- GO Bank
- Goat Simulator (Day 2)
- Heat Street
- Hoxton Breakout (Day 1)
- Hoxton Revenge
- Meltdown
- Santa's Workshop
- Scarface Mansion (broken ceiling turret overhead in the pre-office room)
- Slaughterhouse
- Watchdogs (Day 1)
Strategy
Like Cloakers, the turret tends to spawn in set locations, but can appear at any time: rather than spawning immediately, the turret can remain dormant inside any SWAT van in the map, instead unfolding only when one or more characters ventures too close. As such, players should exercise great care in the maps above lest they put themselves at risk of a surprise attack.
Instead of using audio like other specials, the turret instead relies on visual means to telegraph its attacks. Whilst the laser obviously indicates the direction of attack, the colour indicates its status: red means hostile to the players, amber indicates the eight second reload is underway, green means friendly to players (and hostile to law enforcers), and flashing green indicates the ECM controlling it is about to end.
Note that because the SWAT van itself isn't destroyed (only the turret) the SWAT Van Turret cannot respawn. Unless they can be avoided, players should co-ordinate to destroy SWAT Van Turrets and then resume normal heisting.
Health
The turret has a very high total health, though this is partially countered by damage multipliers granted to players. Additionally, the reason for its (at least initial) durability is due to the armor plating on the front: impenetrable even by armor piercing rounds, players must whittle away at the plate in order to expose the turret's weak point, the targeting lens.
Damage against the plate is capped at x7 for explosives, with an additional cap applied after that prevents any type of attack - bullet or explosive - from dealing more than 3500 damage to the shield or 42,000 to the base, meaning that a high damage weapon such as the HRL-7 will have much of its potential firepower negated; this is additionally restricted as the damage stacking caused by hitting multiple armor plates (as seen with Bulldozers) does not apply to the turret. As such, massive damage weapons like the aforementioned HRL-7 and Thanatos .50 cal, will be very inefficient, whereas the GL40, Frag Grenades or a shotgun with HE Rounds are highly recommended.
An effective way of taking down the shield is with a single Molotov Cocktail thrown on top of the van and next to the turret, the grenade will completely burn through the shield during the course of its duration, even on Death Wish difficulty. This is far from being foolproof, however, as to deal maximum fire damage very careful trajectory calculations must be made prior to throwing, which is hardly feasible when under suppressive fire, and thrown Molotovs can be shot out by the turret if it's still active when the player pops out of cover to toss.
For this reason it is very dangerous to attempt to use the HRL-7 on the turret while it is firing at you because the turret's high rate of fire means it can shoot down the rocket as soon as it's fired, downing the player in line-of-sight of the turret where it will be hard for others to revive you. If using the HRL-7, get someone else to distract the turret or wait for it to reload in order to safely hit it.

Location of the turret's weak spot
Once exposed, the targeting lens (where the laser is emitted) can be damaged. It is highly recommended players concentrate fire at this time, abusing the x100 damage bonus with automatic or high-damage weapons and working together to quickly finish it.
A Thanatos at this point can one-shot kill it on the Overkill difficulty and below (2 on Deathwish).
Another way to deal with the turret is to deploy your own sentry gun to fight fire with fire, or use it as a distraction to allow the rest of the team to flank and destroy the threat. If your sentry gun has a shield it will prove a big advantage, since the bulletproof plating can block all attempts at dealing damage from the SWAT Van Turret.
Damage
The turret has a rate of fire of 1000 rounds/minute, so it is advisable to confront it while it focused elsewhere, friendly, or performing its 8-second reload (yellow laser). The turret's damage also increases with difficulty, and carries a x4 damage multiplier at less than eight metres; combined with 400 round magazines, players must either combine heavy armour (or cover) and distance or very high dodge and speed lest they be ripped to shreds. Due to how dodging and taking damage works, it is possible to continue proccing dodge for as long as the turret shoots the player (with no other units doing so) while taking no damage, making for a useful distraction to take on the turret.
Should players get between ten and eight metres of the vehicle, damage begins to severely ramp upwards from x1.1 to x4 as they approach and, should a player deal reasonable damage when less than eight metres away, they will be subject to flashbang attacks from the turret. With the turret receiving a maximum multiplier of x4 for those within an eight metre radius, the damage of every bullet stacks accordingly:
| Distance | Normal | Hard | V. Hard | Overkill | Death Wish |
|---|---|---|---|---|---|
| 0-8m | 8 | 20 | 44 | 60 | 100 |
| 8-10m | ~4 | ~10 | ~22 | ~30 | ~50 |
| 10-14m | 2.2 | 5.5 | 11 | 16.5 | 27.5 |
| 15m+ | 2 | 5 | 10 | 15 | 25 |
ECMs
Placing an ECM anywhere on the map will cause the gun to temporarily target law enforcers, the targeting laser changing from red to green to reflect this. When the ECM's effect is almost over the laser will flash notifying heisters to move to cover before the turret turns on them.
When the turret is friendly, nearby law enforcers will attempt to seek cover instead of attacking it. Players can either move through open ground while the turret covers them, or take advantage of its lack of hostility, by exposing or destroying the targeting lens, especially when the ECM is about to shut off.
Other Tactics
If a team lacks the firepower to completely destroy a turret or skills to hamper it, there are two key weaknesses that can be used against it:
- It cannot harm players that crouch behind or around the sides of the truck itself (though to make up for this, tear gas may be deployed to force heisters to break off close contact, the van can move around like in Meltdown, and some heists feature the van behind invisible barriers).
- It can only fire in one direction and takes considerable time to switch to another target, allowing heisters to distract it.
Bugs
- Currently, players can mark the base of a turret after it is destroyed. While this is normally unobservable, due to the base being within the van and thus unmarkable through normal means, the base of the ceiling turret in Beneath the Mountain can be marked due to its position.
Achievements

|
Eye for an Eye In the second day of The Biker Heist job, destroy the helicopter turret. Unlocks the "Road Rage" mask, "Chromey" material and "Biker Face" pattern. |
Trivia
- It appears to be based off of the Protector RWS Turret mounted with an M2 Browning machine gun, as can be seen when destroyed, and fitted with various layers of additional armor plates.
The SWAT Van Turret repairing itself while being converted by an ECM.
- The SWAT Van is remotely controlled by an operator inside. It was initially thought that it was possibly automatic due to the lack of any visible human operator, but the release of the FBI files revealed that it is in fact a remotely operated weapon.
- Despite being operated remotely, these Van Turrets are vulnerable to manipulation by ECM Jammers into attacking the law enforcers they are supposed to protect instead.
- Damaged SWAT Van Turrets can repair themselves rather quickly by retracting into their vehicles and re-emerging sometime later.
- If multiple SWAT Turrets appear close to one another, one ECM Jammer will affect all of them the same way.
- The SWAT Turret has the highest "headshot" damage multiplier of all enemy units in Payday 2, at a staggering 100x.
- The SWAT Turret, along with snipers, does not retreat after an assault wave is over. In fact, save for the scripted sequences in Meltdown and The Biker Heist Day 2, most vans and their turrets are modeled directly into the static map geometry. However during assaults the SWAT Turret (except for the helicopter or Scarface Mansion turrets) does retract, only to resurface during an Assault or when heisters approach too close.
- SWAT Turrets controlled by ECM Jammers will show up as the player's favourite weapon during the post-game screen, as simply "Sentry Gun".
- At launch, the Boiling Point ceiling turret displayed the American SWAT name if its shield was destroyed. It was eventually replaced in Update #108.
Gallery
")
")
")
")
Video
")