- "We know the Mendozas are on the run. Seems they are making a last hit on us to retaliate. Our meth lab is under attack, save the meth and save the cooks. You know how to treat the enemy. Do so."
- —Hector contacting the crew for the mission.
Rats is a three-day heist in PAYDAY 2 that is contracted through Hector. The crew is instructed to cook meth, trade it to a rival gang for information on Hector's enemies – who are fleeing Washington, D.C. – and finally eliminate those enemies.
Because of the heist's high experience reward – approximately 271K base experience on Pro Overkill – it is often speedran; see the High-speed walkthrough section.
Day 1
Assets
")
(Bain's Guide)
")
")
")
Normal: $6,000
Hard: $9,000
Very Hard: $12,000
Overkill: $18,000
Deathwish: $30,000
")
Normal: $6,000
Hard: 9,000$
Very Hard: $12,000
Overkill: $18,000
Deathwish: $30,000
")
Normal: $6,000
Hard: $9,000
Very Hard: $12,000
Overkill: $18,000
Deathwish: $30,000
")
Normal: $7,000
Hard: $10,500
Very Hard: $14,000
Overkill: $21,000
Deathwish: $35,000
Req.: Gage Sniper Pack DLC
")
Normal: 3,000$
Hard: 4,500$
Very Hard: 6,000$
Overkill: 9,000$
Deathwish: 15,000$
Req.: Gage Weapon Pack 01 DLC
Objectives
- Locate rival gangs cooks.
- Cook and load 3 bags of meth into van.
- Escape.
Walkthrough
Rats Pro Job Contract Screen.
Arguably the hardest day of the heist, the group starts outside a small derelict building that belongs to Hector and houses a meth lab. The crew is instructed to enter it and have the cooks produce the meth needed for a deal. Unfortunately, the Mendoza gang members are there already, and will execute the cooks as soon as the crew enters the building. This is completely unavoidable; no matter how fast you get into the house and kill the Mendozas, the cooks are scripted to die.
With the cooks dead and the police incoming, the group is forced to cook the meth themselves. With the assistance of Bain they gather the needed chemicals and set to work in cooking the needed bags of meth while fending off the assaulting police force. Bain feeds the group instructions on which chemicals to use. The chemicals are caustic soda, muriatic acid, and hydrogen chloride, which can be found in the basement of the house, the bathroom underneath the stairs, a pickup truck parked nearby, and/or the outdoor sheds, which can be opened with a lockpick or bullets.
If the crew uses the wrong chemical, the lab will explode, setting the room it is located in on fire. Anyone caught in the blast will lose some health and may be downed if you have less than 75% health while still next to it. Bain may get the ingredients wrong, however, he will eventually correct himself, if the crew wait for Bain to clarify the chemical choice.
Once the crew has cooked three bags, they can take them to the nearby extraction van and escape. The crew can stay and cook up to seven bags of meth for additional cash and better results on Day 2.
Tactics
General advice
- Once the heist starts, hurry up and find a full set of ingredients.
- Check hard-to-reach locations first for ingredients; take from outside the house first.
- Open the sheds even if you won't take ingredients from them immediately. Remember the doors can be shot open by shooting the door knob.
- Run the bags to the car and get more ingredients in between assaults, though most would advise all members of the group getting enough ingredients to make a bag of meth to make things a whole lot easier.
- When moving bags, watch for Cloakers. There are at least 2-3 preset hiding spots for them on the route to the van.
- Tell your teammates where they can/cannot find more ingredients.
- Enable subtitles in the options to more easily understand Bain's instructions.
- Bain tells different lines to different players. Communicate when in doubt.
- One bag requires one of each ingredient. It makes sense to have a dedicated cook for each bag, have only one person cook at a time to minimize the confusion.
- When adding an ingredient, read the caption to make sure you are looking at the correct receptacle.
- Barricade windows. There are three sets of planks available.
- Stay upstairs during an assault.
- Ignore the power, especially during an assault.
- Watch the police helicopter carefully, as it does more than just circle the house and make noise;
- If it comes in low on the pickup/van side of the house, it's dropping off a Bulldozer. The Bulldozer is most often armed with a Reinfeld.
- If it hovers directly over the house, it's dropping off a pair of Yellow SWAT onto the balcony. These are fixed spawns regardless of difficulty.
Ingredient locations
A variety of ingredients in the truck
Search the locations in the following order (hardest to easiest):
- White pickup truck parked by the house
- Shed behind the house
- Basement of the house
- Shed in front of the house
- Bathroom in the house
Cooking

Ingredients
Each bag of meth is created with one unit of muriatic acid, caustic soda, and hydrogen chloride. If it helps avoiding confusion, the cook can wait until all three chemicals are used up before searching for more.
In multiplayer, the required ingredient is synchronized across all players, but the dialogue from Bain is not. Ambiguous or incorrect instructions from Bain are shown in boldface below.
Add muriatic acid if you hear:
- Acid, guys, acid. Get some and pour it in there.
- Add muriatic acid, to continue the process!
- Ah, OK... Muria, muriatic acid. Add more.
- Cooking away fine - needs more acid though.
- Hm, yeah it is not caustic soda... Yeah. It should be acid. Yep, sure that is it.
- I'm 100% it is muriatic acid now. Just add it.
- Looking at this site... Says acid is used in this step... We got muriatic, right?
- Mu... Muriatic acid - we need some more in there.
- OK, so add caustic... No, wait, add acid - muriatic acid.
Add caustic soda if you hear:
- Add caustic soda to continue the process!
- Caustic basic reaction is now added. OK you got any soda around? Add it.
- Caustic chloride. Says it is liquid form... Wait a minute... Should be soda, right?
- Caustic soda - yep, that's it. Go for it.
- I'm 100% it is some caustic soda needed here. Drop some in.
- I'm just guessing at this point... These internet descriptions are iffy.
- It needs hydrogen chloride, for sure... OK wait, soda... Yeah, caustic soda!
- Says we need club soda to get this temperature up... Sounds odd. What can you get?
- Try caustic soda....Or hydrogen... No no, wait, soda... Go for that. Yeah.
Add hydrogen chloride if you hear:
- Add hydrogen chloride to continue the process!
- Caustic chloride. Says it is some solid form... Wait a... Should be that hydrogen, right?
- Fuck me, we needed those cooks. I'm going with chloride.
- Fuck me, we needed those cooks. I'm going with hydrogen.
- Fuck me, we needed those damn cooks. I'm going with caustic soda.
- Hydrogen... Is that a gas... Can't be a solid... Says add it. You guys got a gas tank?
- I'm not 100% but I think it is hydrogen chloride now. Yep, should be.
- It needs hydrogen chloride - for sure.
- It needs hydrogen chloride, for sure... No, no wait... Yeah, OK.
- This site says something else... Chloride soda hydrogen mix. I don't know, go for it - something.
Achievements

|
F in Chemistry On day 1 of the Rat job, blow up the lab. |

|
I Am the One Who Knocks On day 1 of the Rats job, cook 3 bags worth of meth without letting any law enforcer enter the house. |

|
Full Measure On day 1 of the Rats job, cook and secure 7 bags worth of meth without blowing up the lab on the OVERKILL difficulty or above. |
Day 2
Assets
")
Objectives
- Trade meth for information.
- Acquire information.
- Escape.
Walkthrough
The crew enters the territory of a vicious gang called the Cobras (who are not affiliated with either Hector's cartel, nor the Mendoza's), with the bags of meth cooked from the previous day. The Cobras have obtained information on where and how the Mendoza leadership is traveling out of Washington, and the plan is for the crew to trade the meth for that information. Depending on how many bags of meth the group brought (and equally dependent on luck), the deal can either go down without a problem, or descend into a firefight. If the deal goes well, the group will be led to the info in a safe, which they can peacefully take and leave.
If the players cooked any extra bags of meth after the required three, there will spawn as many moneybags as any meth you cooked over three. This money will be present whatever variation happens, and is also present if you never even offer them any meth in the first place.
To minimize the risk of a meth bag landing in the wrong place and being impossible to retrieve without upsetting the Cobras (as it may land in the existing bags, with the 'Steal' prompt overriding the 'Pick Up' prompt), throw it straight into the back of the pickup, near the cab/rear window, rather than the middle or rear of the open bed.
Inside the apartments there are two safes, one containing the intel and one containing random loot (instant cash, bag of cash or nothing).
The deal can fail in several ways and places:
- The crew arrives at the trade with insufficient meth bags.
- A player fires an unsuppressed weapon.
- A gang member notices a dead body.
- A player sprints near a gang member.
- The Cobras double cross the group.
- The police ambush the group before the trade begins.
- A player takes back a bag of meth once it is traded.
If the crew did not bring at least three bags, they can choose to sneak in and attempt to find the info stealthily. However, it should be noted that there is a chance the Cobras may do the trade anyway, if the crew brought less than three bags. Gang members can be killed silently as the group makes its way through the buildings (The gang members do not carry pagers).
In the rare case that the police arrive mid-deal, the cobras will flee the area, and ignore the crew and police. This can be used to the crew's advantage, as they can take back the meth bags and locate the intel without concern of the cobras burning it. However, if a player shoots a gang member, they will open fire on the crew while they are fleeing.
If the deal goes wrong, then the crew will be instructed to quickly find the intel, which is hidden in one of possibly two safes, before a gang member burns it. The intel can be in any one of three nearby buildings, and is usually well guarded. If the crew is able to find the safe containing the intel, then it will need to be opened. At this point, the police will somehow be notified and arrive in force, attacking the crew.
Once the crew acquires the intel or discovers that it was destroyed, they can escape to the van. However, the crew can also take back the meth bags for extra cash, regardless of whether or not the deal went smoothly. This can be a bit problematic as the gang members Mark 10s can shred through the crew's defenses fairly quickly and they are all around the place, including the rooftops. Not to mention as many as dozens of gang members will come at the crew in short order, potentially overwhelming them.
One of the safer ways to attempt stealing back the meth is by placing one or two sentry guns near the truck where the bags are, preferably one near the front and back of the truck so the guns will cover the two main areas where the cobras will funnel in and attempt to kill the crew.
This will create a distraction that will allow the crew to easily dispatch the cobras around the area, avoid bullets as the cobras will be more focused on taking out the sentries than the crew, and some decent suppression fire that would easily allow 4 human-controlled players to take all the bags and run back to the getaway van before any kind of effective resistance is mustered or the sentries run out of ammo.
The final approach to the level occurs if the crew failed to secure enough (or any) bags of meth on Day 1. With the foreknowledge that a successful deal is impossible, it is possible to rush the level violently. To prevent the intel from being burnt, it is necessary for the crew to split into two groups of two players each. One pair will go left and go up the left building, while the other goes right will search the other two buildings. The two buildings to the right are connected at the higher floors by boards laid between the windows, so that pair of players can quickly search both buildings. It is highly recommended for each pair to include at least one player with a method of opening safes quickly, such as a Technician with Aced Shaped Charge or a Ghost with Aced Lockpicking Expert. Run up the stairs, shoot all the Cobras in your way, loot the safes, and you can escape the level without tangling with any cops.
As there is always a path guarded by only one gang member leading to the three communicating flats, it's the safest way to get close to three of the four possible locations of the intel. This is the best option playing solo to save time before the Cobras start to destroy the intel and maximizing your chances of finding it (75%).
It is rare, but not impossible, for two tall safes to spawn, either one of which may contain the intelligence. If two members of the team have shaped charges, it may be wise to have both bring them - otherwise the team faces the prospect of holding off a police assault whilst waiting on a drill (if the first blown safe does not contain the intel) or bailing out without the intel.
There is a delay inbetween the safe being opened and the intel being burnt, so it is possible to save time by waiting until one of the Cobras opens the safe, and then killing him and grabbing the intel. The animation for opening the safe involves the Cobra hitting the safe with his fist. If the Cobra is killed before the animation is finished, the safe will not open and the crew will have to open the safe with a drill or shaped charges.
Achievements

|
Caribbean Pirate On day 2 of the Rat job, bring additional meth bags to the trade, but steal your payment instead. |

|
They See Me Baggin', They Hatin' On the Garage escape, get away with 8 bags. |
They See Me Baggin', They Hatin'
The Transporter skill aced is helpful for moving bags.
On Day 1, cook at least six bags of meth. Meth bags are lighter than money bags, so cooking extra meth would make the escape somewhat easier, but a lot of time is given for an escape with eight bags anyway. If you encounter the Garage escape on Day 1, then restart the heist because it cannot be encountered on Day 2, making the achievement impossible.
On Day 2, make the trade. If you traded in at least six bags of meth, then there will be three extra money bags in the room with the intel. Grab enough money bags so that you will end up with at least eight loot bags total after you steal back the meth.
If you do not encounter the Garage escape on Day 2, then restart the heist. Otherwise, bring a saw or shaped charges if possible to open doors faster. Once the escape starts, throw at least eight of the bags onto the level above, towards the corner with the staircase that leads to the surface (4 or 5 o'clock when you spawn). Run to the bags, open the door to the nearby staircase and the door at the top of the staircase, and transport the bags to the escape van.
Day 3
Assets
")
(Bain's Guide)
")
Normal: $
Hard: 9,000$
Very Hard: 12,000$
Overkill: $
Deathwish: $
")
Normal: 7,000$
Hard: 10,500$
Very Hard: 14,000$
Overkill: 21,000$
Deathwish: 35,000$
Req.: Gage Sniper Pack DLC
Objectives
- Kill all of the Mendoza gang members.
- Steal as many bags of cash as possible. (Optional)
- Escape.
Walkthrough
The final day is very straightforward, but may become difficult if the crew chooses to stay behind for the cash.
Alex the helicopter pilot drops the crew off on a bridge where the FBI are escorting Mendoza members out of Washington, D.C. The crew must travel along the bridge to the bus and kill all the gang members aboard. Once accomplished, the crew can return to Alex and escape at any point.
The bus contains 12–16 suitcases; while some may be empty, most contain money. The suitcases filled with money are usually rigged with C4 that must be immediately defused upon bagging the cash. The bombs can only be defused if the crew obtained the intel from Day 2 (it is explained that the Intel contained the defuse codes for the C4, allowing the defuse interaction to be performed). If any of the bombs explode, then the entire bus will explode, incapacitate any players in or near the bus, and destroy all the money inside. There will be ~5-6 explosions in a row with a short delay between each of them, and each explosion will also generate a blinding flash of light. Hence, it is advised that all money bags should be thrown away from the bus as soon as possible, in case of an accident occurring. If the players did not obtain the Intel on Day 2, the maximum number of money bags they can easily obtain is four (one per player); each player should open a suitcase, bag the money simultaneously, throw the bags out of the bus, and leave before the C4 detonates. However, a player who has the Ghost skill Fast Hands Ace can pack bags quickly enough to pack and throw two bags clear of the bus and run out before the bombs explode. If they're very quick, they may even be able to secure a third bag, though this is highly unlikely.
If the crew takes more bags than they can carry at once (more bags than they have players), then they should wait for the loot extraction helicopter (flown by the crew's second pilot, Bile) to arrive, because Alex's escape helicopter cannot take loot bags except those directly carried on each player's back. When the helicopter arrives, the crew can throw all of the money bags into it, but must protect the helicopter from police fire (which will force Bile to fly away early), and also be careful not to throw the bags into the water. Do not throw the bags at the railing because despite the bags' apparent size, they can fall through it. Once all the money bags are loaded into Bile's helicopter, return to the normal extraction zone under Alex's helicopter to complete the heist.
Additional Notes
- One of the fastest ways to deal with all of the Mendozas is to sprint up to the front of the bus and throw a grenade in through the front window. Whilst this is risky (as the Mendozas are armed with the Mark 10) the grenade will catch all of them due to the confined space. Using a grenade in this manner does not set off the C4. It is also possible to simply jump onto a car at the start and use a high-accuracy weapon (such as a sniper rifle) to kill all the gang members in the bus from afar, and run back to the escape.
- With the Ace Pilot asset, Bile will hover closer to the bridge and the bus, and may be less likely to fly away if under fire - though as long as your team is well-coordinated, the bus should be empty and the bags ready to be secured in the second chopper long before it arrives, and thus have the bags secured well before Bile is in any kind of serious danger.
- If attempting a speedrun, or if playing on Death Wish, the player crew can simply find a defensible spot near the extraction zone and hunker down there and let the law enforcers take care of the gangsters in the bus. This is by far the least dangerous way of tackling Day 3, and the escape will trigger as soon as the final gangster falls, though the money cases on the bus will have to be forfeited if the players decide to leave as soon as possible.
Achievements

|
Short Fuse On day 3 of the Rat job, get away with 7 bags without defusing any bombs. |

|
Breaking Bad Complete the Rats job on the Death Wish difficulty. |

|
If You Can’t Take the Heat... Complete the Rats pro job on the Death Wish difficulty. |

|
Four Monkeys In the Rats job, complete the heist while you and your four man crew are wearing one different "Shotgun Pack" mask each on OVERKILL difficulty or above. |
High-speed walkthrough
Rats can usually be completed in less than 15 minutes, even in solo, but only on Overkill difficulty or lower, as the lab cannot be detonated on Deathwish without killing the crew so that players must cook three bags of meth and cannot rush the day.
On Day 1, the crew must blow up the lab as soon as possible, so players must grab two ingredients, wait at the lab, put in the wrong ingredient, and run from the explosion. (On consoles, the crew can escape immediately and skip to Day 2.)
Adept combatants may wish to hold out where the escape vehicle will arrive, but there are several highly defensible locations at which the crew can take cover while the escape vehicle is on its way:
- The small room behind the lab, which does not catch fire. The two windows should be boarded so that no enemies can enter the room or shoot through the windows. To escape, sprint through the fire, jump over the balcony to the left onto a shed, then go directly to the escape vehicle.
- The bathroom. As of August 2014, enemies do not enter the bathroom, and it is somewhat closer to the escape.
- The basement. Typically, one player waits at the lab to add the wrong ingredient while the rest defend the basement. Inspire aced is recommended for one of the players in the basement, in case the player upstairs gets downed.
On Day 2, the crew must go loud, and either use Shaped Charges on the safe with the intel or wait for the gangsters to open the safe.
On Day 3, the crew must simply kill the gangsters inside the bus. A player with a high-accuracy Rattlesnake and high-magnification scope can accomplish this within 15 seconds while near the escape vehicle. Optionally, if the crew obtained the intel on Day 2, they may wish to hire the Ace Pilot and spend an extra few minutes to loot the bus.
Trivia
- This was the longest and most complex heist included in the beta until Framing Frame succeeded it.
- Since the AI behavior was improved following the Hotline Miami DLC's release, the law enforcers will turn on and shoot at any gangsters who leave the bus, contradicting their original intentions to escort them to the airport safely. Likewise, the gangsters will shoot at law enforcers from the bus.
- As such, the player crew can complete Day 3 without firing a single shot if they can find a defensible spot near the extraction zone and hunker down there. The escape will trigger as soon as the final gangster falls, though the money cases on the bus will have to be forfeited if the players decide to leave as soon as possible.
- Rats is featured on the splash image of the "Time of Day" heist setting community reward on the CrimeFest website[1], though said feature is not implemented in the final heist gameplay.
- The Day 1 of the heist is highly prone to accidental failures due to miscommunication between Bain and the crew, the chemicals he calls out might not be correct and may cause the lab to blow up should they be added.
- The description in Bain's guide of day one of this heist is a reference to the TV series Breaking Bad, in which the protagonist produces and sells meth.
- The blue color of the meth may also be based on Breaking Bad, whose protagonist cooks blue meth.
- The achievement "I am the one who knocks" is also a Breaking Bad reference, being it a quote from protagonist Walter White. The achievement "Full Measure" might also be a reference to the show, as an episode is existing with the same name and the supporting character Mike Ehrmantraut is having a "No more half measures" speech which has become quite popular among the fan base.
- If the crew cooks 7 bags of meth, Bain will say "We should break bad and do this full-time!" or "Which one of you is Heisenberg, Hector wants to know." when the crew escapes, both being Breaking Bad references.
- Caustic soda is also known as sodium hydroxide, a strong base. Muriatic acid and hydrogen chloride are identical chemicals at the molecular level, with the former being a solution of the latter. In real life, combining muriatic acid or hydrogen chloride with caustic soda yields aqueous sodium chloride (salt water).
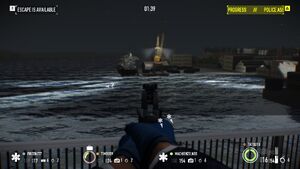
Watchdogs Day 2 in the distance
- On Day 3, the docks at which Day 2 of Watchdogs takes place is visible from the bridge.
- Rats is internally referred to as "Alex Must Die!".
- During the Halloween event the Witch from Left 4 Dead could be heard crying on Day 1, she was behind one of the fences between the front shed and the truck.
Death Wish changes
- On Day 1, the wrong ingredient causes the whole map to blow up. Even if Pistol Messiah is used for revival, the van will never arrive, so the contract will have to be terminated. Players must therefore cook at least three bags of meth before waiting for the escape van to arrive.
