m (→Trivia) Tag: sourceedit |
Tags: Visual edit apiedit |
||
| Line 59: | Line 59: | ||
===Sociopath=== |
===Sociopath=== |
||
| − | The Sociopath deck was added as part of the [[Jacket Character Pack]]. It is required the players to own [http://store.steampowered.com/app/274170/ Hotline Miami 2 Digital Special Edition on Steam] to unlock the perk deck. It is a close quarter combat-oriented deck that acts somewhat similar to the Infiltrator perk deck. The only major differences are that the Sociopath is meant to regenerate player`s armor instead of reducing incoming damage, and can also cause nearby enemies to panic (Showdown). However, unlike infiltrator, this tree is focused on maintaining momentum in close combat. High damage melee weapons are preferred as the regenerating health skill only activated upon a kill rather than a hit. Compared to the recovery skill offered by Infiltrator, the Sociopath deck can heal {{Color|positive| |
+ | The Sociopath deck was added as part of the [[Jacket Character Pack]]. It is required the players to own [http://store.steampowered.com/app/274170/ Hotline Miami 2 Digital Special Edition on Steam] to unlock the perk deck. It is a close quarter combat-oriented deck that acts somewhat similar to the Infiltrator perk deck. The only major differences are that the Sociopath is meant to regenerate player`s armor instead of reducing incoming damage, and can also cause nearby enemies to panic (Showdown). However, unlike infiltrator, this tree is focused on maintaining momentum in close combat. High damage melee weapons are preferred as the regenerating health skill only activated upon a kill rather than a hit. Compared to the recovery skill offered by Infiltrator, the Sociopath deck can heal {{Color|positive|50%}} vs {{Color|positive|20%}} in the same time provided each kill is done in melee. The final skill is invaluable as the possibility of causing enemy to panic can allow a window of opportunity to attack with reduced harm. |
===Gambler=== |
===Gambler=== |
||
| Line 68: | Line 68: | ||
=== Yakuza === |
=== Yakuza === |
||
| + | The Yakuza deck was released with the [[Yakuza Character Pack]]. This deck encourages a high risk hit and run playstyle meant to be used with [[Berserker]] for doing a lot of damage while weaving from cover to cover to kill enemies in close combat. When combined with heavy armor such as the ICTV, the benefits are profound as you can recover armor quicker than other players. However be advised that you can only regain health using first aid kits or doctor bags once your health hits either the 25%/50% mark. |
||
| − | The Yakuza deck was released with the [[Yakuza Character Pack]]. |
||
==Mutual Perks== |
==Mutual Perks== |
||
Revision as of 14:16, 30 August 2015
The Perk Decks
The Perk Decks system was added on Day 5 of CrimeFest 2014, and formed one of the main parts of Update 39 along with an extensive rebalance of existing Skills.
Replacing passive tier bonuses, the Perk Decks system allows players to pick from eleven different "decks", each with nine perks (though the skills at second, fourth, sixth, and eighth rank are shared between all current decks). Only one perk deck can be active at a time.
Presently, Perk Decks are not reset when going Infamous.
Unlike skill trees which cannot be fully unlocked because of the limited number of skill points obtainable in-game, Perk trees rely on the player's XP income which is limitless, thus allowing one to eventually unlock/complete all eleven decks. This is offset by the fact that the player may only have one active perk deck at a time.
Gaining Perk Points
Gaining perk points is simple - after earning XP, go to the Skills & Perks screen and view the Perks Deck tab (selected in the upper left). If you have earned any experience since you last checked the Perk Decks tab, the game will then 'convert' that XP into perk points at a given ratio, which mostly depends upon current player level - as a benchline, round your level up to the nearest 10, then multiply by 10. For instance, at level 45 (rounding up to 50), the conversion ratio will be 500:1.
The conversion ratio is set by the level you were at after the skill points were added to your total, e.g. if you were level 60 (600:1 ratio) when you began a heist, but the experience gained raised you to level 61 (700:1), then the ratio for level 61 would be applied. If you should forget to convert points in between heists, the conversion calculation will apply the level you are at when you do process your perk points, even if the final heist of the series raised you to a higher conversion ratio. For example, if you had not converted points for three consecutive heists and only the final heist had raised your level to 61 (where the 700:1 ratio begins), the 700:1 ratio would still be applied to all the skill points being processed. This means it is to the player's advantage to process this conversion after every heist, just to ensure that no loss of perk points results from applying a higher conversion ratio than necessary.
The experience converted into perk points is not deducted from your overall level progress.
In addition, experience points earned past the level cap of 100 can also be converted into perk points - just visit the Perk Decks tab as you would normally.
- Note: If a player go Infamous with un-exchanged perk points, but has yet to gain a level, the 1000:1 XP-to-perk-point ratio of the previous tier's reputation 100 still applies.
However, once you have attained the maximum number of perk points (i.e. 150,700 which completes all perk decks), you will no longer gain any more perk points. Any new perk decks introduced thereafter will require you to earn your perk points again.
Spending Perk Points
After you've earned perk points, you can now spend them on your perk decks. This is as simple as using the + (plus) button under the perk you wish to unlock. As long as a perk has not been fully unlocked, you can withdraw the points at any time by using the - (minus) button under the perk, but once a perk has been fully unlocked you can never get the points back.
Perks are on a simple line progression -- to be able to purchase the second tier perk you must first own the first tier perk, and so on.
Do note that although all perk trees has several common perk tiers, they are not shared among each other, meaning that, for example, unlocking the Crew Chief deck's Walk-In Closet perk will still cost an additional 1,600 perk points to unlock it again if one were to switch to a less-invested tree.
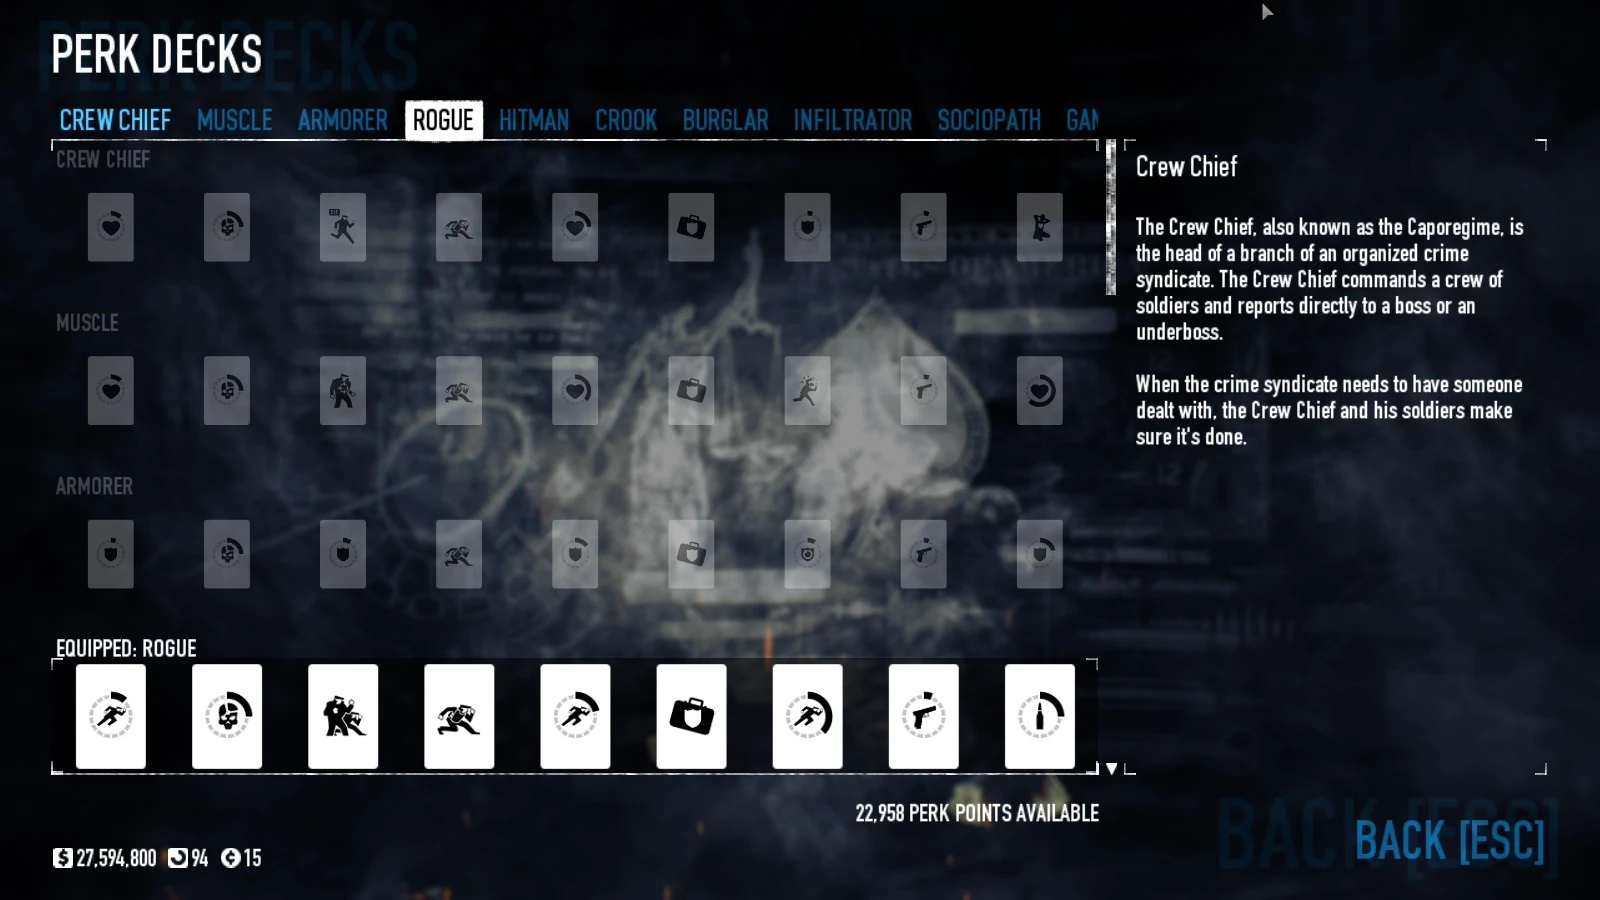
Available Perk Decks
There are eleven decks in the game:
Crew Chief
The Crew Chief deck is well-rounded, increasing the user's health and offering team-wide benefits such as increased stamina, health, and armor. As of Update 45, the increase in shout distance provided by the third perk in this deck, Marathon Man, does not provide an increase to the 7 meter range of the Mastermind skill Inspire; it is unclear if this is by design. As of Update 74, the final perk also grants a 8% damage reduction for the crew as long as one tied hostage is present.
Muscle
The Muscle deck focuses on increasing health and survivability when armor is down, potentially granting up to +90% health (up to 418 base health) when maxed out. It also allows players to draw fire away from their allies, whilst at higher ranks it allows the use of certain weapon groups to terrify enemies (Disturbing the Peace), effectively incapacitating them for a short period. Note that though the perk description of Disturbing the Peace states that LMGs, Sniper Rifles, and SMGs can provide the terror effect, it fails to mention that they do not do so with equal effectiveness. SMGs provide the least effect, with only a 5% chance. LMGs and Sniper Rifles both have double that, 10% chance, but since LMGs have much higher fire rates and can sweep an entire arc of fire, the LMG will proc the effect the most frequently of the three weapon type. The Vulcan Minigun also triggers this effect with the same frequency as LMGs, despite being classified as a "Special" weapon. Its massive rate of fire makes it very effective for this purpose. As of update 74, the final perk grants players to regenerate +4% health every 5 seconds.
Armorer
The Armorer deck focuses on improving armor durability and recovery time, with a potential maximum of +35% armor. A simple but effective choice for players who wish to enhance their already-durable armor, or patch up their defenses a little. Since the perks which improve armor rating are applied as percentages of your armor's base armor rating, this perk deck grants the largest gains to players who customarily wear the heaviest armors, i.e. the Combined Tactical Vest and Improved Combined Tactical Vest. For that reason players who are focusing on the Fugitive skill tree's boosts for wearers of ballistic vests might do better to make use of either the Hitman or Crook perk deck instead.
Rogue
The Rogue deck largely focuses on increasing Dodge chance, granting a fairly significant +25% once mostly completed. Its most significant effects do not kick in until much later - though once mastered, it provides massively decreased weapon switching time and nearly instant weapon switch if using Akimbo and Equilibrium in combination. It should be noted that the total of the increases to dodge chance provided by this deck will not, on their own, overcome the negative dodge values of any mid-tier or heavier armors, which range from -30 for the Heavy Ballistic Vest up to -50 for the Improved Combined Tactical Vest. So players planning to do the majority of their fighting in such armor may wish to choose another perk deck which better suits their preferred equipment and situation. And of course players who plan to wear a suit during the stealth phases of heists and use the Armor Bag deployable to switch to one of the heavier armors when the heists go loud will get no benefit from this perk deck's dodge chance boosts, unless they have other boosts to dodge chance from one or more skill trees that, when added to the perks, overcomes the relatively high negatives imposed by the heavier armors, and even then will only receive marginal dodge chances at best in return for a large investment of perk and skill points.
Hitman
The Hitman deck was added as part of John Wick promotion and trades armor durability for faster armor recovery as well as introducing the ability to dual-wield a specific group of pistol-class weapons, albeit with severe stability penalties and limited accuracy. This deck can provide some benefit for stealth-oriented players as several akimbo weapons have very high concealment and are fairly inexpensive. This deck also stacks well with players planning to ace the Enforcer skill Die Hard and/or the Technician skill Bulletproof which increase armor recovery rate by 15% and 25% respectively. Since armor recovery bonuses stack multiplicatively, taking both skills along with this perk deck allows the player to reduce the armor recovery period from the base 3 seconds to 1.05 seconds, a 65% reduction. Such a build would provide high survivability for players who frequently duck behind cover (for reloading) in-between bursts of firing. This is well suited to those who primarily use weapons with very low rates of fire (e.g. sniper rifles) or weapons which require very frequent reloads (e.g. SMGs with very high rates of fire) and adopt the fighting style mentioned earlier. Moreover, the armor reduction this perks imposes in exchange for its very high boosts to recovery rate are felt least by players wearing lower-rated armor, so this perk deck can be a good match for those who focus on the Fugitive skill tree's armor boost for players wearing ballistic vests (Thick Skin) and its boosts to dodge and critical chance for players with below 35 concealment (Low Blow and Sneaky Bastard), though the Crook perk deck's increases to dodge chance for ballistic vest wearers may still be overall better in this case.
Crook
The Crook deck largely focuses on increasing Dodge chance for ballistic vests users, providing up to +45% dodge chance to early to mid tier armor. The final tier effect provides faster armor recovery. It should be noted that all armors (excluding the suit) have negative dodge values as their base, so this perk deck will not result in any positive chance for the player to dodge fire until several perk levels have been unlocked. The lower level the armor, the earlier this perk deck will overcome its negative base dodge stat to begin providing active assistance in dodging fire, and the higher the eventual dodge chance will be once all the dodge chance perks have been unlocked. For example, the standard Ballistic Vest has a base dodge rating of -25, so the player will see no active benefit from this perk deck until the fifth tier perk Advanced Composure has been unlocked, at which point the player will see an active dodge chance of 5% from the combined perks up to that point. This is irrespective of any boosts to dodge the player may be receiving from skills, however.
As of update 74, the Crook deck also grants up to 65% increased bonus armor when using any of the ballistic vest variants. This is enough to give the heavy ballistic vest a significantly higher armor rating than the combined tactical vest, as well as the heavy ballistic having a higher dodge and speed rating.
Burglar
The Burglar deck was added as part of the Clover Character Pack. It is required that players own this DLC to unlock the perk deck. It is a fully stealth-oriented deck, granting bonuses to lockpicking, bagging bodies and answering pagers. When completed, the Burglar is also suitable as a partial replacement for Rogue and Crook (+20% additional dodge when standing still or crouching) as well as an alternative to Chameleon Aced (+20% less likely to be targeted).
Infiltrator
The Infiltrator deck was added as part of the Dragan Character Pack. It is required that players own this DLC to unlock the perk deck. It is a close quarter combat-oriented deck, conferring bonuses to damage resistance when surrounded by many enemies (up to 32% when around 3 enemies or more) and enhances one's melee capability close up with damage boosts and a new health-restorative ability. Please note that the damage boost only applies on consecutive hits.
Sociopath
The Sociopath deck was added as part of the Jacket Character Pack. It is required the players to own Hotline Miami 2 Digital Special Edition on Steam to unlock the perk deck. It is a close quarter combat-oriented deck that acts somewhat similar to the Infiltrator perk deck. The only major differences are that the Sociopath is meant to regenerate player`s armor instead of reducing incoming damage, and can also cause nearby enemies to panic (Showdown). However, unlike infiltrator, this tree is focused on maintaining momentum in close combat. High damage melee weapons are preferred as the regenerating health skill only activated upon a kill rather than a hit. Compared to the recovery skill offered by Infiltrator, the Sociopath deck can heal 50% vs 20% in the same time provided each kill is done in melee. The final skill is invaluable as the possibility of causing enemy to panic can allow a window of opportunity to attack with reduced harm.
Gambler
The Gambler deck was added in the third day of the Spring Break event. It utilizes Ammo pickups in terms of survivability, healing the player (Medical Supplies) and teammates (Sharing is Caring) as the player picks up ammo, together with supplying teammates with half as much ammo as the player receives from pickups dropped by fallen enemies. Retrieving arrows, bolts, shurikens, or cards won't trigger this effect.
Grinder
The Grinder deck was released with the Sokol Character Pack. A full Grinder deck regenerates 40 health over 4 seconds every time the player does damage to an enemy, but the effect can only be triggered once every second and only while wearing a Two-Piece Suit or Lightweight Ballistic Vest (the effect can stack, up to 4 times before the first instance expires). This deck is most useful with rapid-fire and damage-over-time weaponry, being able to be triggered via Tripmines, poison, and Molotovs. It may also be triggered on Dominated and Jokered enemies as well, if needed in a pinch. However enemies with a yellow outline (hostage to-be-traded, thus invulnerable) will no longer grant health. It also passively grants the player 40% more health (up to 308 base health) and a 30% chance to pierce enemy armour.
Yakuza
The Yakuza deck was released with the Yakuza Character Pack. This deck encourages a high risk hit and run playstyle meant to be used with Berserker for doing a lot of damage while weaving from cover to cover to kill enemies in close combat. When combined with heavy armor such as the ICTV, the benefits are profound as you can recover armor quicker than other players. However be advised that you can only regain health using first aid kits or doctor bags once your health hits either the 25%/50% mark.
Mutual Perks
These are the perks found on each and every perktree. The number in parentheses (e.g. (200)) beneath the tier number indicates how many perk points must be spent on that tier's skill to unlock it.
| Perk Decks | |||
|---|---|---|---|
| Tier 2 (300) | Tier 4 (600) | Tier 6 (1,600) | Tier 8 (3,200) |
 Helmet Popping[1] Increases your headshot damage by 25%. |
 Blending In You gain +1 increased concealment. When wearing armor, your movement speed is 15% less affected. You gain 45% more experience when you complete days and jobs. |
 Walk-in Closet Unlocks an armor bag equipment for you to use. The armor bag can be used to change your armor during a heist. Increases your ammo pickup to 135% of the normal rate. |
 Fast and Furious You deal 5% more damage. Increases your doctor bag interaction speed by 20%. |
- ↑ Helmet Popping stacks multiplicatively; e.g. only 32 base damage is required to kill an FBI: Heavy Response Unit, who has 130 health, because 32 × 3.25 (headshot multiplier) × 1.25 (Helmet Popping) = 130 damage.
Comparison Table
The table below shows a comparison between the values that differ per tree. The number in parentheses (e.g. (200)) beneath the tier number indicates how many perk points must be spent on that tier's skill to unlock it.
| Perk Decks | ||||
|---|---|---|---|---|
| Tier 1 (200) | Tier 3 (400) | Tier 5 (1,000) | Tier 7 (2,400) | Tier 9 (4,000) |
| Crew Chief | ||||
 Brute Strength You gain 10% more health. |
 Marathon Man You and your crew's stamina is increased by 50%. Increases your shout distance by 25%.[1] |
 Wolf Pack You and your crew gains 15% more health.[1] |
 Testudo You gain 10% more armor and your crew gains an additional 5% more armor.[1] |
 Hostage Situation You and your crew gains 2% max health and 4% stamina for every hostage, up to a maximum of 10 hostages. You and your crew will gain 8% damage reduction for having a hostage.[1] |
| Muscle | ||||
Brute Strength You gain 10% more health. |
 Meat Shield You are 15% more likely to be targeted when you are close to your crew members. You gain 10% more health. |
 Giant Strength You gain an additional 30% more health. |
 Disturbing the Peace You can now use LMGs, SMGs, and Sniper Rifles to spread panic among your enemies. Panic will make enemies go into short bursts of uncontrollable fear. |
 800-pound Gorilla You gain an additional 40% more health. You regenerate 4% of your life every 5 seconds. |
| Armorer | ||||
Type I Armor You gain 10% more armor. |
 Type II Armor You gain an additional 10% more armor. |
 Type III Armor You gain an additional 10% more armor. |
 Reinforced Armor Your armor recovery rate is increased by 10%. |
 Liquid Armor You gain an additional 5% more armor. Reduces the armor recovery time for you and your crew by 10%.[1] |
| Rogue | ||||
 Subtle Your chance to dodge is increased by 5%. |
 Elusive You are 15% less likely to be targeted when you are close to your crew members. |
 Evasive Your chance to dodge is increased by an additional 10%. |
 Shadow Warrior Your chance to dodge is increased by an additional 10%. |
 Killer Instinct All your weapons have a 25% chance to pierce enemy armor. The time between swapping weapons is reduced for you by 80%. |
| Hitman | ||||
Basic Recovery Your armor recovery rate is increased by 5%. |
 Ambidexterity You can dual wield two weapons. These can be found under the Akimbo tab in the inventory menu. (Primary weapons) Dual wielded weapons have a 75% stability penalty Your armor recovery rate is increased by an additional 10%, but you lose 5% armor. |
 Advanced Recovery Your armor recovery rate is increased by an additional 10%, but you lose 5% armor. |
 Expert Recovery Your armor recovery rate is increased by an additional 10%, but you lose 5% armor. |
 Tooth and Claw Your armor recovery rate is increased by an additional 10%, but you lose 5% armor. Your stability penalty with Akimbo weapons is set to 50% and increases the ammo capacity of your Akimbo weapons to 125%. |
| Crook | ||||
Subtle Your chance to dodge is increased by 5%. |
 Basic Composure Your chance to dodge is increased by 10% for ballistic vests. Your armor is increased by 20% for ballistic vests. |
 Advanced Composure Your chance to dodge is increased by 10% for ballistic vests. Your armor is increased by 20% for ballistic vests. |
 Expert Composure Your chance to dodge is increased by 15% for ballistic vests. Your armor is increased by 25% for ballistic vests. |
Master Recovery Your armor recovery rate is increased by 10%. |
| Burglar | ||||
Subtle Your chance to dodge is increased by 10%. |
 Bag of Tricks Standing still and crouching decreases your chances to be targeted an additional 10%. You bag corpses 20% faster. |
 Luck of the Irish Your chance to dodge is increased by an additional 5%. Your chance to be targeted while standing still and crouching is decreased by an additional 5%. You pick locks 20% faster. |
 Dutch Courage Your chance to dodge is increased by an additional 5%. Your chance to be targeted while standing still and crouching is decreased by an additional 5%. You answer pagers 10% faster. |
 Breath of Fresh Air Standing still and crouching increases your armor recovery rate by 20%. |
| Infiltrator | ||||
 Basic Close Combat When you are within medium range of an enemy, you receive 8% less damage from enemies. |
 Advanced Close Combat When you are within medium range of an enemy, you receive an additional 8% less damage from enemies. |
 Expert Close Combat When you are within medium range of an enemy, you receive an additional 8% less damage from enemies. Each successful melee hit grants a 10% melee damage boost for 7 seconds and can stack up to 4 times. |
 OVERDOG When you are surrounded by three enemies or more, you receive an additional 8% less damage from enemies. Each successful melee hit grants an additional 10% melee damage boost for 7 seconds and can stack up to 4 times. |
 Life Drain Striking an enemy with your melee weapon regenerates 20% of your health. This cannot occur more than once every 10 seconds.[2] |
| Sociopath | ||||
No Talk When you are within medium range of an enemy, you receive 8% less damage from enemies. |
 Tension Killing an enemy regenerates 30 of armor. This cannot occur more than once every 2 seconds. |
 Clean Hit Killing an enemy with a melee weapon regenerates 10% health. This cannot occur more than once every 2 seconds. |
 Overdose Killing an enemy at medium range regenerates 30 armor. This cannot occur more than once every 2 seconds. |
 Showdown Killing an enemy at medium range has a 75% chance to spread panic among your enemies. Panic will make enemies go into short bursts of uncontrollable fear. This cannot occur more than once every 2 seconds. |
| Gambler | ||||
 Medical Supplies Ammo packs you pick up also yield medical supplies and heals you for 8 to 12 health. Cannot occur more than once every 4 seconds. |
 Ammo Give Out When you pick up ammo, you trigger an ammo pickup for 50% of normal pickup to other players in your team. Cannot occur more than once every 5 seconds. |
 Sharing Is Caring When you get healed from picking up ammo packs, your teammates also get healed for 100% of the amount. |
 More Healing 1 Increase health gained from ammo packs by additional 4. |
 More Healing 2 Increase health gained from ammo packs by additional 4. |
| Grinder | ||||
 Histamine Damaging an enemy heals 1 life points every 0.5 seconds for 5 seconds. This effect stacks, but cannot occur more than once every 1.5 seconds, and only while wearing the Two-Piece Suit or Lightweight Ballistic Vest. |
 Adrenaline Damaging an enemy now heals 2 life points every 0.5 seconds for 5 seconds. You gain 20% more health. |
 Endorphins Damaging an enemy now heals 3 life points every 0.5 seconds for 5 seconds. Your chance to pierce enemy armour is increased by 10%. |
 Dopamine Damaging an enemy now heals 4 life points every 0.5 seconds for 5 seconds. You gain 20% more health. |
 Euphoria Damaging an enemy now heals 4 life points every 0.5 seconds for 6 seconds. Your chance to pierce enemy armour is increased by 20%. |
| Yakuza | ||||
 Koi Irezumi The lower your health, the more armor recovery rate you have. When your health is below 25%, you will gain up to 20% armor recovery rate. NOTE: Entering this state negates regeneration effects. |
 Hebi Irezumi The lower your health, the more movement speed you gain. When your health is below 25%, you will gain up to 10% movement speed. |
 Tora Irezumii The lower your health, the more armor recovery rate you have. When your health is below 25%, you will gain up to an additional 20% armor recovery rate. |
 Ryu Irezumi The lower your health, the more armor recovery rate you have. When your health is below 25%, you will gain up to an additional 20% armor recovery rate. |
 Oni Irezumi All berserker effects in this perk deck will start at 50% health instead of 25%. |
Trivia
- Each of the Sociopath deck's perks is named after a mission in Hotline Miami: No Talk, Tension, Clean Hit, Overdose, and Showdown.
- The Ambidexterity perk was released prior to the Akimbo skill. If an akimbo weapon was in the inventory, it would claim that either the Ambidexterity Perk or the Akimbo Skill was required to unlock when the Hitman perk deck was not equipped, leading many to (correctly) speculate that a skill titled Akimbo would later be released.
- Five of the perk decks roughly correspond to each of the five skill trees, though it is not necessarily better to use the listed perk deck with its accompanying skill tree:
- Crew Chief corresponds with Mastermind.
- Muscle corresponds with Enforcer.
- Armorer corresponds with Technician.
- Rogue corresponds with Ghost.
- Crook corresponds with Fugitive.
- Every single perk deck corresponds to one of the heisters:
- Crew Chief corresponds with Dallas.
- Muscle corresponds with Chains.
- Armorer corresponds with Wolf.
- Rogue corresponds with Houston.
- Hitman corresponds with John Wick.
- Crook corresponds with Hoxton.
- Burglar corresponds with Clover.
- Infiltrator corresponds with Dragan.
- Sociopath corresponds to Jacket.
- Gambler corresponds to Bonnie.
- Grinder corresponds to Sokol.
- Yakuza corresponds to Jiro.
Gallery
")
")