Firestarter Contract Screen.
Firestarter is a three-day heist in Payday 2, contracted by Hector. The goal is to cripple the arsenal and finances of a rival gang, The Mendoza Cartel. The crew must steal or destroy the weapons inside a hangar on Day 1, steal a server from an FBI building on Day 2, and burn cash inside a bank vault on Day 3.
Day 1
Assets
Objectives
- Locate the open hangar containing the weapons.
- Steal or destroy the required amount of weapons.
- (Optional) Steal or destroy the remaining weapons.
- Escape.
Walkthrough
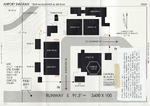
The crew starts outside of an airfield controlled by the Mendoza Cartel. There are four hangars, and the only one that is open contains all of the weapon cases (two open hangars on Death Wish). Each case can either be stolen or destroyed. The number of cases that the crew is required to steal or destroy varies, but is always at least four. Inside the hangar are two trucks which contain weapons; they can be opened from the back with a drill, a saw or C4. Access to the weapons inside the truck is usually not necessary to complete the day, as sufficient cases will be present outside of trucks. However, if you have decided to steal the weapons, it is worth opening the trucks to get all the loot. Be aware of the fact that a hangar will sometimes have an accessible stairway at the back that goes up to a 2nd floor loft that will contain several weapon cases.
If you wish to complete this stealthily, then you must not alert any of the Mendozas, even if they are killed immediately after. It is advisable not to go solo as usually there are groups of two or three gang members facing each other which need to be taken out at the same time. Beware of any cameras placed high on the hangars exterior walls, including those in the back alleys. Cameras can be destroyed without raising suspicion.
If the police are alerted, then they will arrive very quickly. Some will enter from the back alleys, but most of them will climb either of the two chain-link fences across from the hangars.
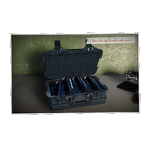
- If you wish to steal weapons, then you must carry them back to the van where you started. Each case is very heavy, but is the second most valuable bag of loot.
- If you wish to destroy weapons, then you must locate the tank of jet fuel, which is randomly placed next to one of the hangars. Shoot the tank from at least a few meters away until it explodes. The weapons can be thrown into the burning fuel, but try to avoid damage from the explosions that occur when a case is destroyed.
If the crew is successful in eliminating the gangsters without triggering a police response, yet still desires to destroy the weapons for whatever reasons, they can do so as mentioned above. It is worth mentioning that as of Update #25.1. It is recommended that at least 2 - 3 of your crew members has 2 body bags each to hide the bodies.
Day 2
Assets
Objectives
The objectives for this mission can follow a simple branching path.
- Locate the server room.
- Break into the server room.
- Break through the inner door.
- Drill through the server protection shutters.
- Take the server to the van.
- Escape.
Objectives (stealth)
- Locate the server room.
- Hack the computer.
- Cut the wires.
- Break into the server room.
- Break through the inner door.
- Take the server to the van.
- Escape.
Walkthrough
If you simply cannot or have no desire to complete any portion of this heist stealthily, then read on. Otherwise, skip to the next section.
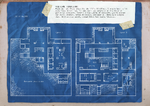
The FBI branch office is a medium-sized, two-story office building with about a dozen offices, an operations center, an evidence room - potentially loaded with confiscated loot - and a server room containing a server on which the whereabouts of the Mendoza Cartel's dirty money can be found.
Once inside, you must locate the server room. This can be in one of four places:
- The rear wall of the main office area (diagonally opposite the evidence room)
- The second floor conference area next to the conference room
- The second floor conference area across the hall from the operations center
- The second floor, across from the cafeteria (above the main lobby to the right)
Upon picking the lock to the outer door, you must break through the second door inside the room itself. It is important to note that having ECM Overdrive aced, shaped charges, or an OVE9000 saw are the only surefire way to avoid drilling the door open. There is occasionally a safe in the station chief's office which contains a keycard to open the inside door, but the safe spawn is uncommon. If the safe doesn't spawn, one of the guards may have the card. Since killing the guards is already a dubious prospect, it is better simply to come prepared, either with shaped charges or the properly skilled Ghost. Finally, you must drill open the barrier protecting the server. Be ready for a good fight, as this will take a few minutes.
Internally, the layout of the office can be partially compared to Plan C of Election Day, with lots of long hallways and little partial cover, only doorways and offices to duck into, with many corners. Players taking cover in the server room itself should be especially careful, as the server room ceiling always has a ceiling vent somewhere - a Cloaker can easily drop down and incapacitate a member of the team. There are several other vents throughout the upper level office area as well.
Once you're through the barrier, you may remove and bag the server without further ado. The server itself weighs you down as much as a bag of gold, so keep that in mind when trying to escape in a hurry.
Optional Step: The previously mentioned evidence room can contain some extremely valuable loot - or possibly nothing at all. If you wish to loot that as well, it is recommended that someone on your team bring a saw or shaped charges. It is best to ignore the server and take the loot over to the van as the alarm is triggered - before the police arrive. Doing this will leave you only with the server to worry about getting across the road.
Stealth walkthrough
The FBI branch office is a medium-sized, two-story office building with about a dozen offices, an operations center, an evidence room - potentially loaded with illicit loot - and a server room containing a server on which the whereabouts of the Mendoza Cartel's dirty money can be found. There are more than five guards and possibly as many as eleven – a stealthy attempt will require that the players simply avoid the guards whenever possible. To make matters worse, any guards killed will be swiftly replaced via the two elevators behind the front desk.
The first step is breaking in, which can be accomplished via one of two doors to the main lobby or a side entrance which leads into the main office area. These may all be picked - or shot open if you are in a hurry. Despite Bain's misgivings, either entrance can be advantageous; It really matters where the highest concentration of guards are at any given time. Be careful to check security camera locations and angles before entering the building. Trying to avoid guards may place you in the vision of an inconveniently located camera and shooting them is not an option if stealth is the goal.
Once inside, you must locate the server room. This can be in one of four places:
- The rear wall of the main office area ('kitty-corner' to the evidence room)
- The second floor conference area next to the conference room
- The second floor conference area across the hall from the operations center
- The second floor, across from the cafeteria (above the main lobby to the right)
In the next phase, Bain will tell you where to go to access a computer which he can hack to reveal the proper wire boxes to sabotage so that the alarms don't go off when you pick your way into the server room. Interestingly enough, cutting the wires in these boxes will also prevent the server barrier from engaging even if the alarm is set off by a guard, pager or camera; this allows at least part of the heist to be completed in stealth. The computer will be one of at least half a dozen possible candidates, which may occur in the station chief's office, one of several offices on the first or second floor of the main work area, or one of several computers in the operations center on the second floor. Once you've gotten Bain in, he will indicate two of the many boxes - the exact number of them depends on the difficulty level and can be as high as five. When disabling the alarm circuit boxes, be aware that disabling the wrong one will immediately trigger the alarm and close off the server from easy access - the barrier that comes down can only be drilled open. Beware, each box may be directly in the visual range of a security camera, and cameras and guards alike will be alerted upon noticing an opened wire box. Therefore, it is imperative to open the box, cut the wire and close it again as quickly as possible when the opportunity presents itself, possibly with the help of an ECM jammer if necessary. It is possible to guess at the proper boxes to disable - without first giving Bain access to a computer, but doing so is extremely risky on overkill; Only a ten percent chance (one over the combination 5 choose 2, without repetition). That should be avoided unless going for the achievement (Guessing Game), in which case you should probably be doing it on normal difficulty.
Finally, once the server room door alarm has been disabled, you must break through the final door inside the room itself. It is important to note that having ECM Overdrive aced is the only surefire way to avoid drilling the door open. There is occasionally a safe in the station chief's office which contains a keycard to open the inside door, but the safe spawn is uncommon. If the safe doesn't spawn, one of the guards may have the card. Since killing the guards is already a dubious prospect, it is better simply to come prepared with the properly skilled Ghost.
Once you're through the door, you may remove and bag the server without any trouble. The server itself weighs you down as much as a bag of gold, so keep that in mind when trying to escape in a hurry.
Optional Step: The previously mentioned evidence room can contain some extremely valuable loot - or possibly nothing at all. If you wish to loot that as well during stealth then the evidence room can be silently drilled open, but there is still a slim chance the drill may be seen by passing guards if they walk close to the evidence room.
Important notes
- New guards will arrive via the elevator behind the main lobby to replace those who are killed during a stealth attempt.
- There are often some actual FBI agents loitering about the office, easily distinguishable by their casual attire and tendency to stand in one place. Like any other law enforcers, they can instantly ruin a stealth attempt if they notice you. However, they can also be killed without setting off a pager and safely removed if the coast is clear. They do not respawn.
- The evidence room is always in the same place.
- If there is a camera in the station chief's office, it can be shot without any guards coming to check on it. This allows the room to be used as a convenient place to hide bodies. Note that every now and then, a camera on the outside of the office will see the camera get shot out.
- Any of the side entrances could have a camera placed outside looking at them. If you simply must enter through such a door, it is highly recommended to use an ECM jammer or quickly shoot the door open with a silenced weapon, because shooting the camera will cause a guard to come investigate it. The bathroom entrance usually has a camera facing it on the inside, whilst the back 'left' entrance most often has the camera overlooking the door from outside in a position where any guard standing near the door will be able to see what state the camera is in.
Day 3
Assets
Objectives
- Shut off the power to the electrified vault.
- Move the thermal drill to the vault door.
- Start the drill. (359 seconds)
- Break into the second vault door. (random)
- Set up the camera in the vault.
- Light money stash on fire.
- Loot the deposit boxes. (Optional)
- Get the recording.
- Escape.
Walkthrough
Day 3 takes place on a map that is identical to Bank Heist in many ways, with just a few differences in the heist itself. Notably, the vault door is initially electrified, and prevents players from setting up the thermal drill. Any attempts to do so are punished with a taser-like effect that immobilizes the player character and causes him to pull his weapon's trigger for several seconds. In order to disable the electrical defenses, the crew must breach a security door on the roof (which exists only on Firestarter Day 3, not Bank Heist), next to the stairwell. The keycard, which is located either on the bank manager or his desk, can be used to quickly open it without any skills.
Once through, interact with the circuit breaker inside, then start the thermal drill. Once the vault door is open, the inner cage door in the vault may be locked and must also be opened with a drill, Shaped Charges or the OVE9000 saw. Once inside the vault, the crew must set up the camera and ignite the stack of cash. While the money burns, the crew may decide to open the deposit boxes for some extra loot. After 90 seconds of burning, the crew must take the camera and escape in the van.
Death Wish Mode Changes
Day 1:
- All cameras are Titan cameras.
- There are two hangars open, instead of just one, and twice the number of Cartel members. You must steal or destroy at least 8 bags of weapons.
Day 2:
- All cameras are Titan cameras.
- Two servers must be secured instead of one.
Day 3:
- All cameras are Titan cameras.
- There are always three skylights on the roof of the bank, allowing civilians and guards to spot heisters there if they are not careful.
Trivia
- On Day 2, with 5 boxes there is a 1 in 10 chance (10%) of cutting both correct wires without hacking the computer. With 4 boxes, the chance is 1 in 6 (~16.7%).
- Usually on Day 3, if gas occurs while the money is burning inside the vault, the vision clears up and the player will no longer be obstructed of their vision from the fire.
- Bain will often make an empathetic/sympathetic comment or will make a point when the heisters are about to set the money on fire. Examples of these include: "I know it's sad" and "Most of it is marked anyway."
Achievements

|
Lord of War On day 1 of the Firestarter job, steal all the weapons from the hangar. |

|
Guessing Game On day 2 of the Firestarter job, complete the heist in stealth without hacking the computer. |

|
The First Line On day 3 of the Firestarter job, find the rare hockey poster of the OVERKILL hockey team. |

|
I’m a Firestarter Complete the Firestarter job on the Death Wish difficulty. |

|
Into the Lion’s Den Complete the Firestarter pro job on the Death Wish difficulty. |
Guessing Game walkthrough
Play on Normal difficulty so that there are only three or four boxes to choose from, as opposed to four or five. Because the two correct wires are randomized, the probability of correctly guessing which two wires to cut is ~33.3% if there are three boxes, and ~16.7% if there are four. Because "in stealth" means "without the alarm being triggered" as opposed to "without being detected", there are several popular methods of unlocking the achievement.
Trivial approach
Sneak around the guards and stay undetected as you cut the wires and access the server room. It is advised that the crew has either ECM Overdrive or Silent Drilling because it is risky to use a loud drill on the inner door.
Brute-force ECM co-op
This approach is the fastest in general, but requires:
- Four players who have aced ECM Specialist to delay the pagers of any dead guards and the basic ECM Overdrive for increased ECM duration.
- One player with ECM Overdrive aced to open the inner door of the server room.
- One player with a Two-Piece Suit, basic Shinobi, and aced Transporter to move the server.
- Alternatively, the OVE9000 saw can be used to cut through the doors for faster access.
The player who aced ECM Overdrive must save one ECM jammer for the inner door, which leaves seven ECM jammers for delaying alarms and pagers. Because each upgraded jammer lasts approximately 30 seconds, the crew has up to 210 seconds (240 if the saw is equipped) between detection and the alarm trigger. Only one ECM jammer needs to be active at a time; to maximize the amount of time available, each jammer should be deployed just before the previous one expires. The crew may decide to start their ECM chain as soon as they enter the building for maximum speed, or once one or two wires are located to decrease the amount of searching required.
During this time, the crew must:
- Rush through the building.
- Locate the server room door.
- Hack the computer.
- Search for the two wires and cut them.
- Breach the outer door of the server room.
- Open the inner door with the ECM Overdrive aced.
- Carry the server to the van (whoever has a Two-Piece Suit, basic Shinobi and aced Transporter).


